

A stitch in time saves nine.
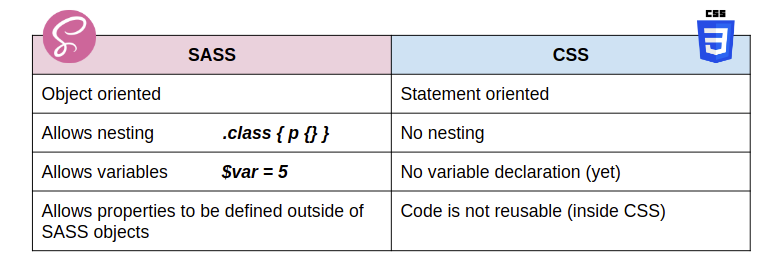
Sass (Syntactically Awesome Style Sheets) is the most popular solution to writing well-structured, cross-browser supported CSS in the most developer friendly way possible.
Once you switch to this next level transpiling option, there is absolutely no chance that you're going back to writing styling of nested elements the way CSS forces you to
Setting up a project in Sass..
It's just about following these 4 steps that'll save you tonnes of time and energy that CSS takes up
-
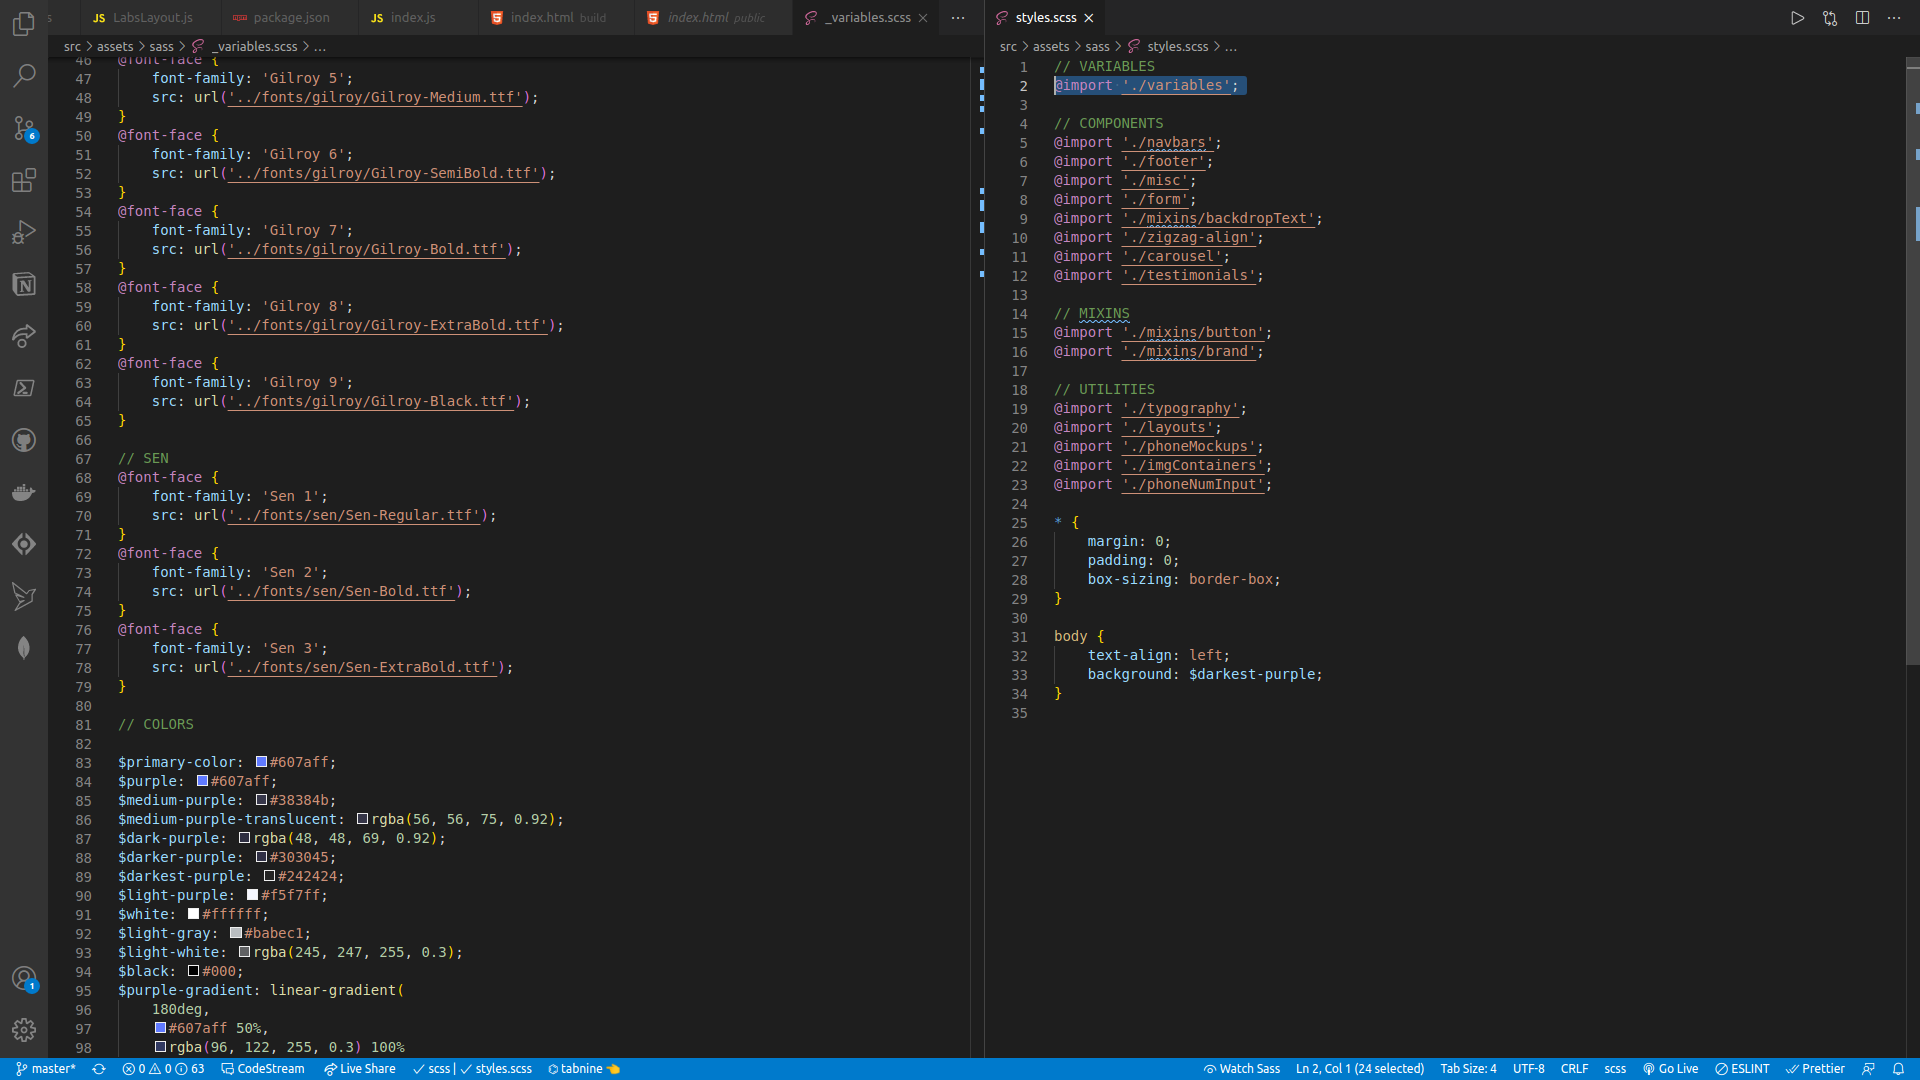
Create a separate folder called sass and create a main file called styles.scss (arbitrary name) inside of it. Also, create a folder called css and create a file styles.css (arbitrary name)
-
Install a compiler
-
Feel free to create more supporting files to compartmentalize your code into smaller CSS modules by following these 2 rules
- The filename should be prefixed with an underscore i.e. '_' eg: _header.scss
- This file must be imported in the scss directory using the @import option in scss.
-
Next, create a .vscode (for VSCode users) or .idea (for WebStorm users) folder where you set up a configuration file mapping the source file (styles.scss in sass folder) to the destination file (styles.css in the css folder).
This basically just tells your transpiler to take all the code imported from separate CSS modules and the code present in your source file to be compiled into the destination CSS file that can be globally imported into your project's top level component
Significant superpowers
Sass is basically CSS with superpowers. I've listed the most common ones that you'll be working with most of the time
1. Variables
Variables are a way to store information that you want to reuse throughout your stylesheet.
You can store things like colors, font stacks, or any CSS value you think you'll want to reuse. Sass uses the $ symbol to make something a variable. Here's an example:
SCSS SYNTAX
$font-stack:    Helvetica, sans-serif;
$primary-color: #333;

body {
  font: 100% $font-stack;
  color: $primary-color;
}
CSS OUTPUT
body {
  font: 100% Helvetica, sans-serif;
  color: #333;
}
- When the Sass is processed, it takes the variables we define for the
$font-stackand$primary-colorand outputs normal CSS with our variable values placed in the CSS. - This can be extremely powerful when working with brand colors and keeping them consistent throughout the site.
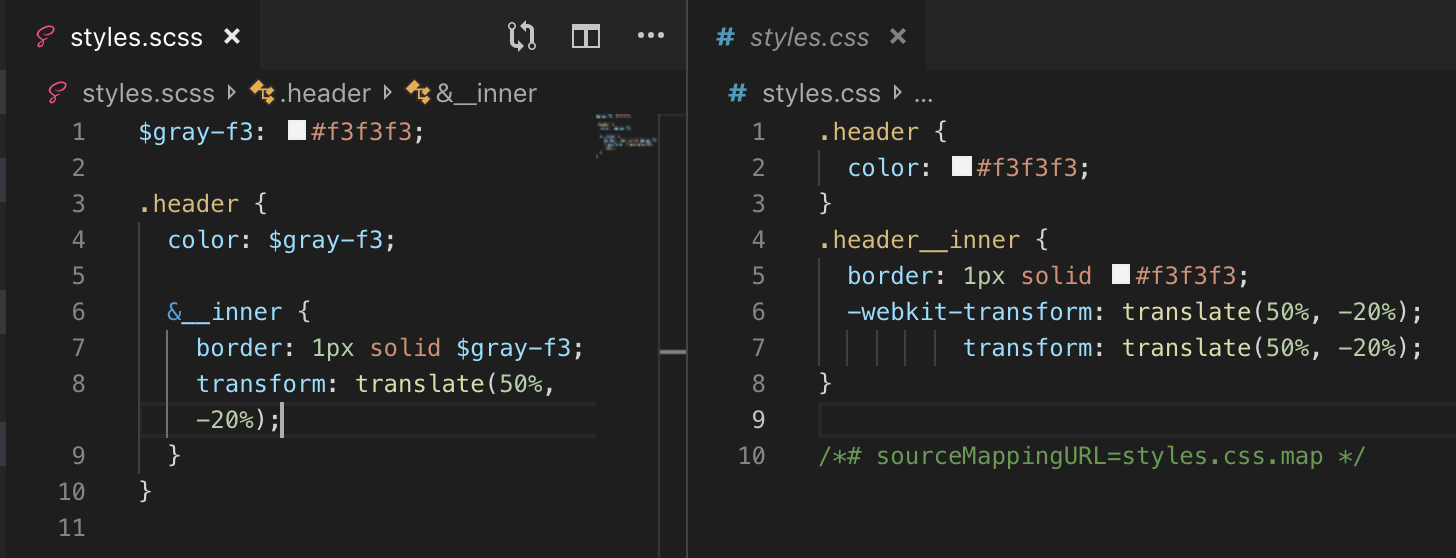
2. Nesting
- When writing HTML you've probably noticed that it has a clear nested and visual hierarchy. CSS, on the other hand, doesn't.
- Sass will let you nest your CSS selectors in a way that follows the same visual hierarchy of your HTML. Be aware that overly nested rules will result in over-qualified CSS that could prove hard to maintain and is generally considered bad practice.
- With that in mind, here's an example of some typical styles for a site's navigation:
SCSS SYNTAX
nav {
  ul {
    margin: 0;
    padding: 0;
    list-style: none;
  }

  li { display: inline-block; }

  a {
    display: block;
    padding: 6px 12px;
    text-decoration: none;
  }
}
CSS OUTPUT
nav ul {
  margin: 0;
  padding: 0;
  list-style: none;
}
nav li {
  display: inline-block;
}
nav a {
  display: block;
  padding: 6px 12px;
  text-decoration: none;
}
You'll notice that the ul, li, and a selectors are nested inside the nav selector. This is a great way to organize your CSS and make it more readable.
3. Mixins
A mixin lets you make groups of CSS declarations that you want to reuse throughout your site.
You can even pass in values to make your mixin more flexible. A good use of a mixin is for vendor prefixes. Here's an example for transform.
SCSS SYNTAX
@mixin transform($property) {
  -webkit-transform: $property;
  -ms-transform: $property;
  transform: $property;
}
.box { @include transform(rotate(30deg)); }
CSS OUTPUT
.box {
  -webkit-transform: rotate(30deg);
  -ms-transform: rotate(30deg);
  transform: rotate(30deg);
}
- To create a mixin you use the
@mixindirective and give it a name. - We've named our mixin
transform. We're also using the variable$propertyinside the parentheses so we can pass in a transform of whatever we want. - After you create your mixin, you can then use it as a CSS declaration starting with
@includefollowed by the name of the mixin.
4. Extend/Inheritance
- Using
@extendlets you share a set of CSS properties from one selector to another. It helps keep your Sass very DRY (Don't Repeat Yourself). - In our example we're going to create a simple series of messaging for errors, warnings and successes using another feature which goes hand in hand with extend, placeholder classes.
- A placeholder class is a special type of class that only prints when it is extended, and can help keep your compiled CSS neat and clean.
SCSS SYNTAX
/* This CSS will print because %message-shared is extended. */
%message-shared {
  border: 1px solid #ccc;
  padding: 10px;
  color: #333;
}

// This CSS won't print because %equal-heights is never extended.
%equal-heights {
  display: flex;
  flex-wrap: wrap;
}

.message {
  @extend %message-shared;
}

.success {
  @extend %message-shared;
  border-color: green;
}

.error {
  @extend %message-shared;
  border-color: red;
}

.warning {
  @extend %message-shared;
  border-color: yellow;
}
- What the above code does is tells
.message,.success,.error, and.warningto behave just like%message-shared. - That means anywhere that
%message-sharedshows up,.message,.success,.error, &.warningwill too. - Each of these classes will get the same CSS properties as
%message-shared. This helps you avoid having to write multiple class names on HTML elements. - Note that the CSS in
%equal-heightsisn't generated, because%equal-heightsis never extended.
Evidence ..
This is how you can get upto 95% reduction in the number of lines you code by writing styling in Sass instead of CSS
Conclusion...
And that is how, in 5 easy steps, you go from a junior developer to an experienced frontend engineer writing extensible, reusable, readable code that is enjoyable to read and work upon !
If you're interested in checking out more of the CSS superpowers that Sass and other CSS language extensions like Less grant, I would highly recommend you to go read their own beautifully written and explained docs.
